Verifying VoiceOver: Accessibility Inspector
Now that you have a good idea on how to improve your app for VoiceOver, you may wonder if there are other options to test and verify it apart from manually testing on a device.
Well, good news: there are a bunch of options to test your accessibility-related code. Let’s take a look at the Accessibility Inspector.
- Getting Started With Accessibility: VoiceOver
- Improving Accessibility: VoiceOver
- Verifying VoiceOver: Accessibility Inspector (this post)
- Improving Accessibility: Voice Control
- Getting Started With Accessibility: Dynamic Type
Introduction
Accessibility Inspector is an app that comes bundled with Xcode, alongside other apps like the Simulator and Instruments. As the name suggests, the accessibility inspector lets you inspect apps, scanning its accessibility elements to get a better understanding (or to verify) its accessibility.
Apart from (manually) inspecting apps, the Accessibility Inspector comes with an automated audit tool, an (accessibility) notification console, and a color contrast calculator. It’s quite packed!
Inspection
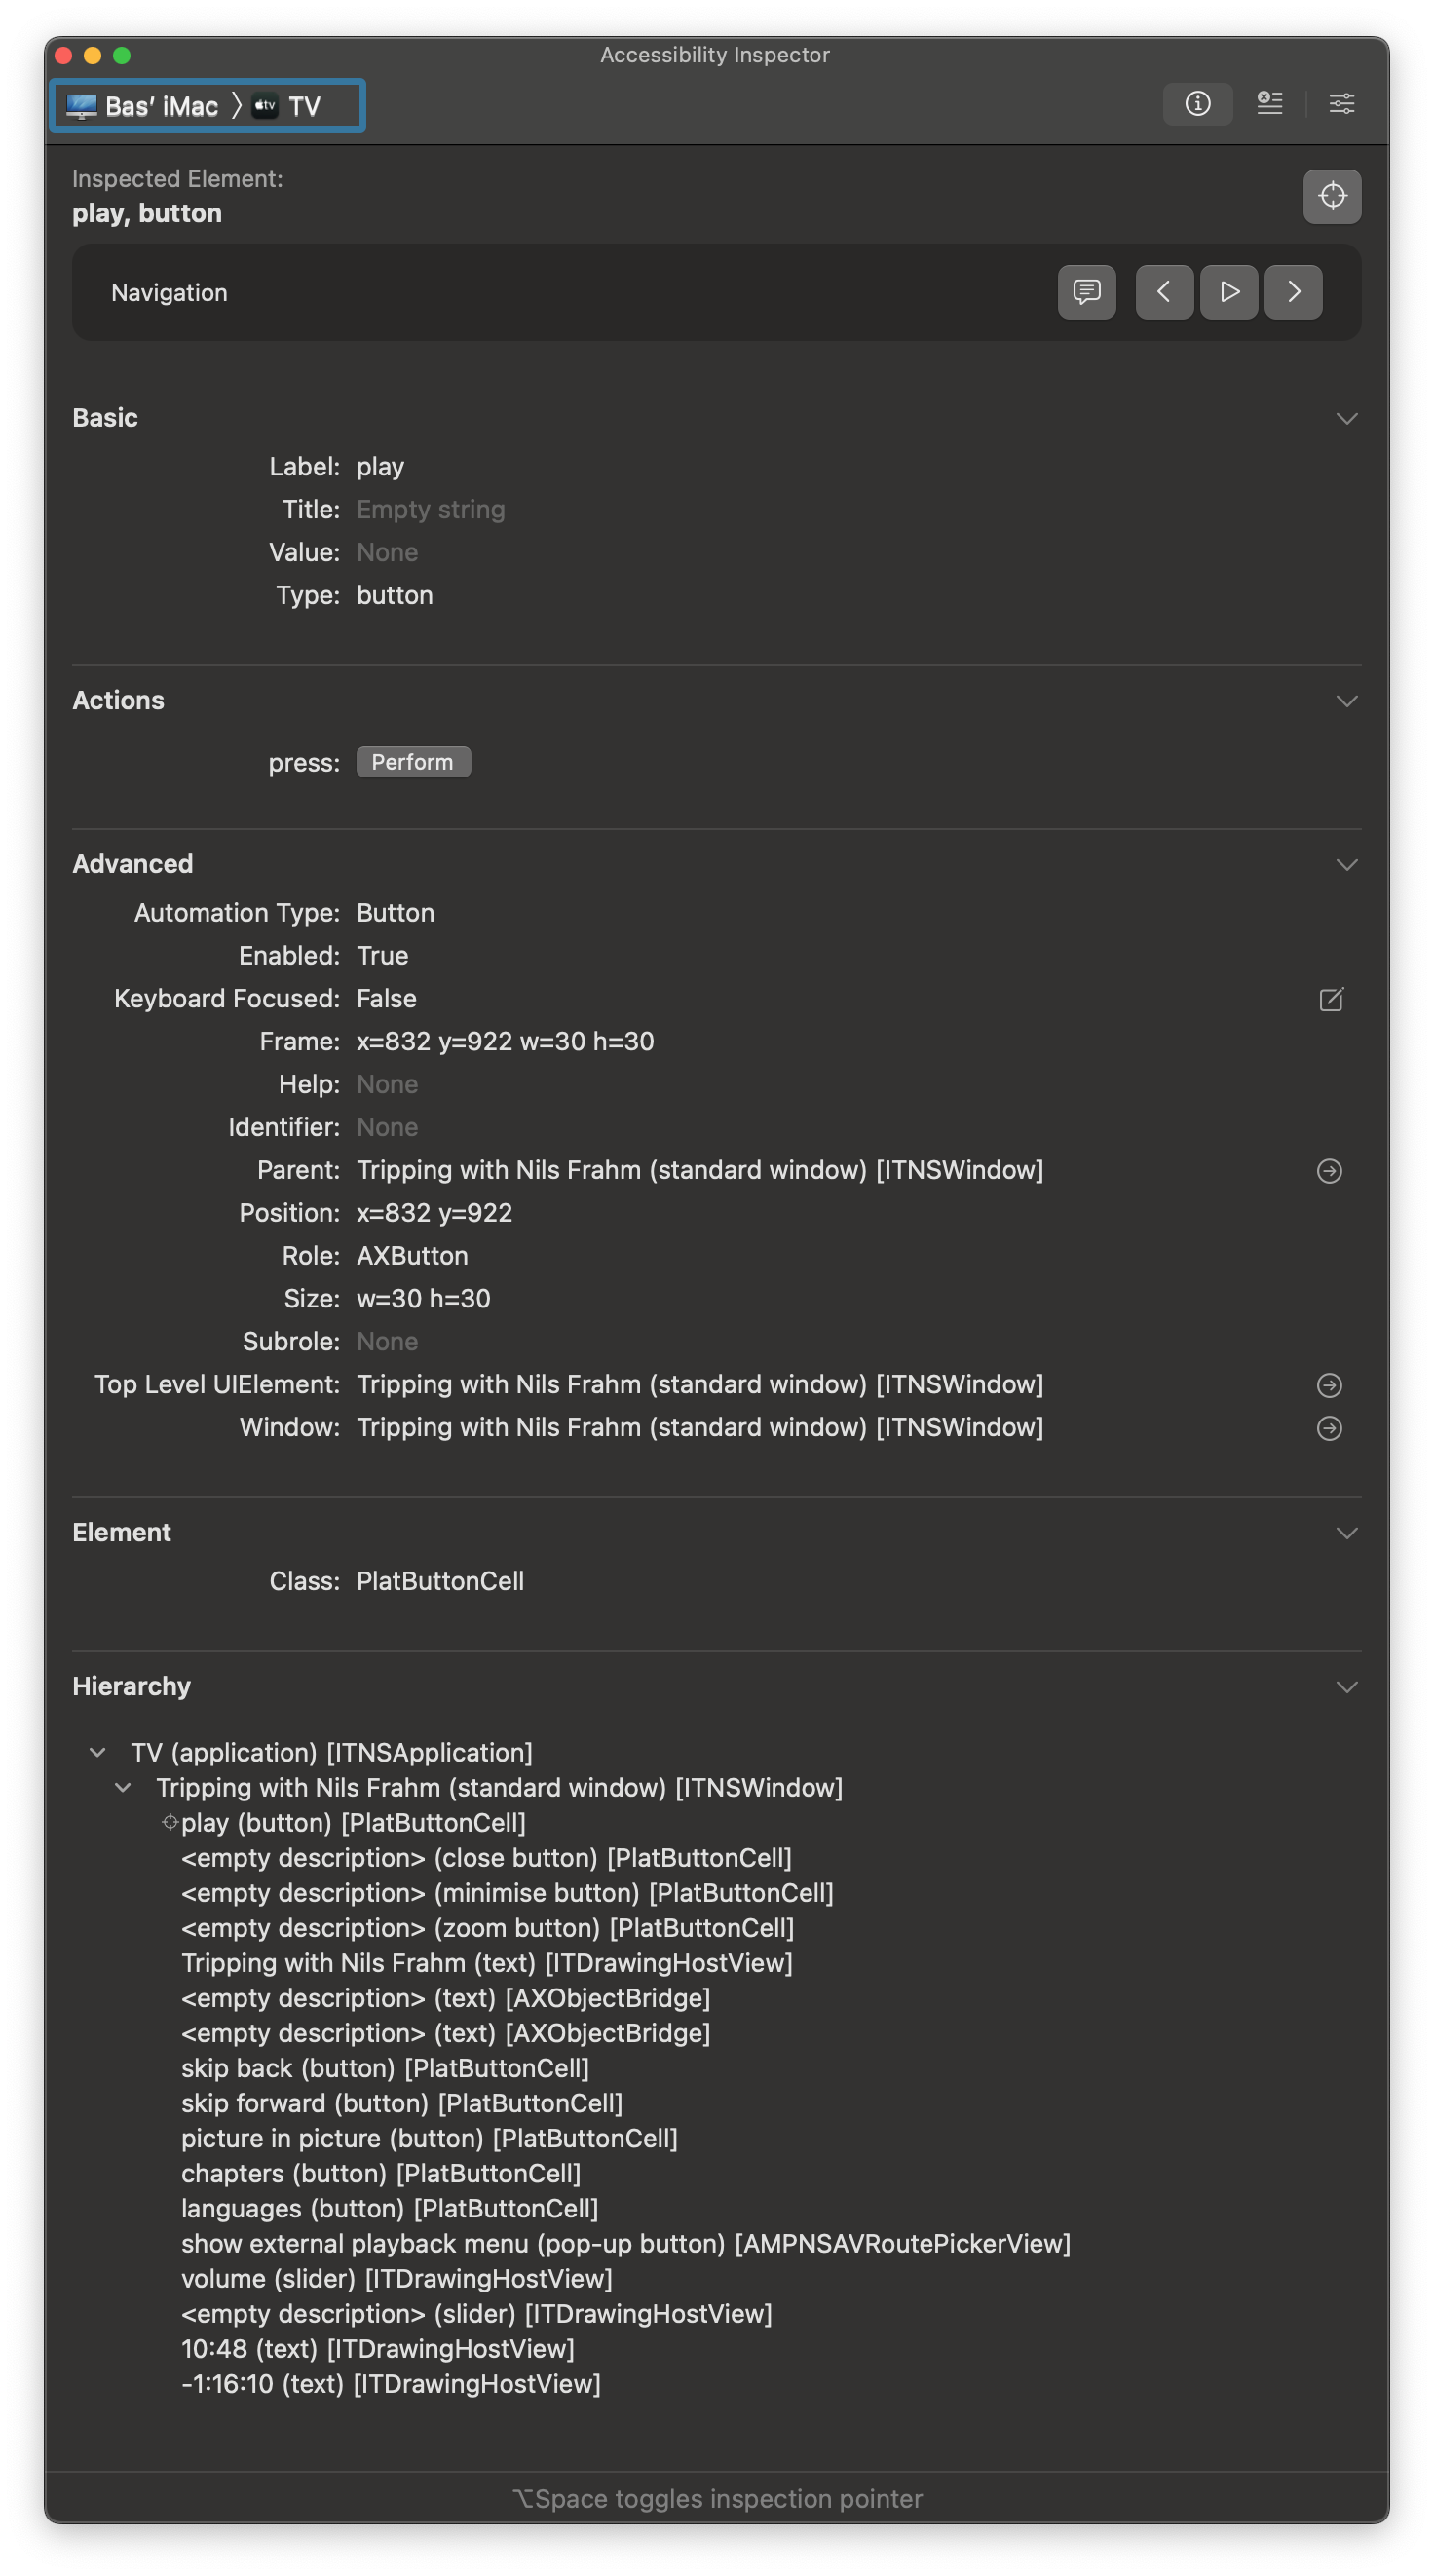
To inspect elements in apps, start by choosing your device — by default the Mac the inspector is running on. You can (and should) change that to the appropriate device, like the simulator or your (wirelessly) connected device. When inspecting on macOS, also make sure to pick the process you want to inspect.
On the Mac, you’ll be presented with multiple sections:
- Basic, which includes the elements label, title, value, and type;
- Actions, including all accessibility actions (which you can activate from within the app!);
- Catalyst shows, when inspecting a Catalyst app, the underlying iOS-based information for accessibility;
- The advanced view shows you a bunch more information, from the element’s size to its help text;
- Element gives you the element’s class;
- Hierarchy shows the hierarchy of the siblings of the inspect element, as
well as its parents. In the menu bar, you can show ignored elements by going
to
Inspection > Show Ignored Elements.
When inspecting on the simulator, or an iOS device, the sections are mostly the same, yet missing the “advanced” view… which is a shame, as it houses a bunch of useful information that would also be interesting to inspect for iOS apps. Alas.
Custom Content
Custom Content, unfortunately, can’t be checked using the inspector (FB9824602), making it a bit trickier to verify. A shame, as it can really improve the accessibility experience.
What you could do, is to a) verify on-device, or b) by enabling macOS
VoiceOver, navigating to the view (including the iOS-view in the simulator),
and using the VoiceOver modifier keys + command + /; note that the latter
requires macOS Monterey or later.
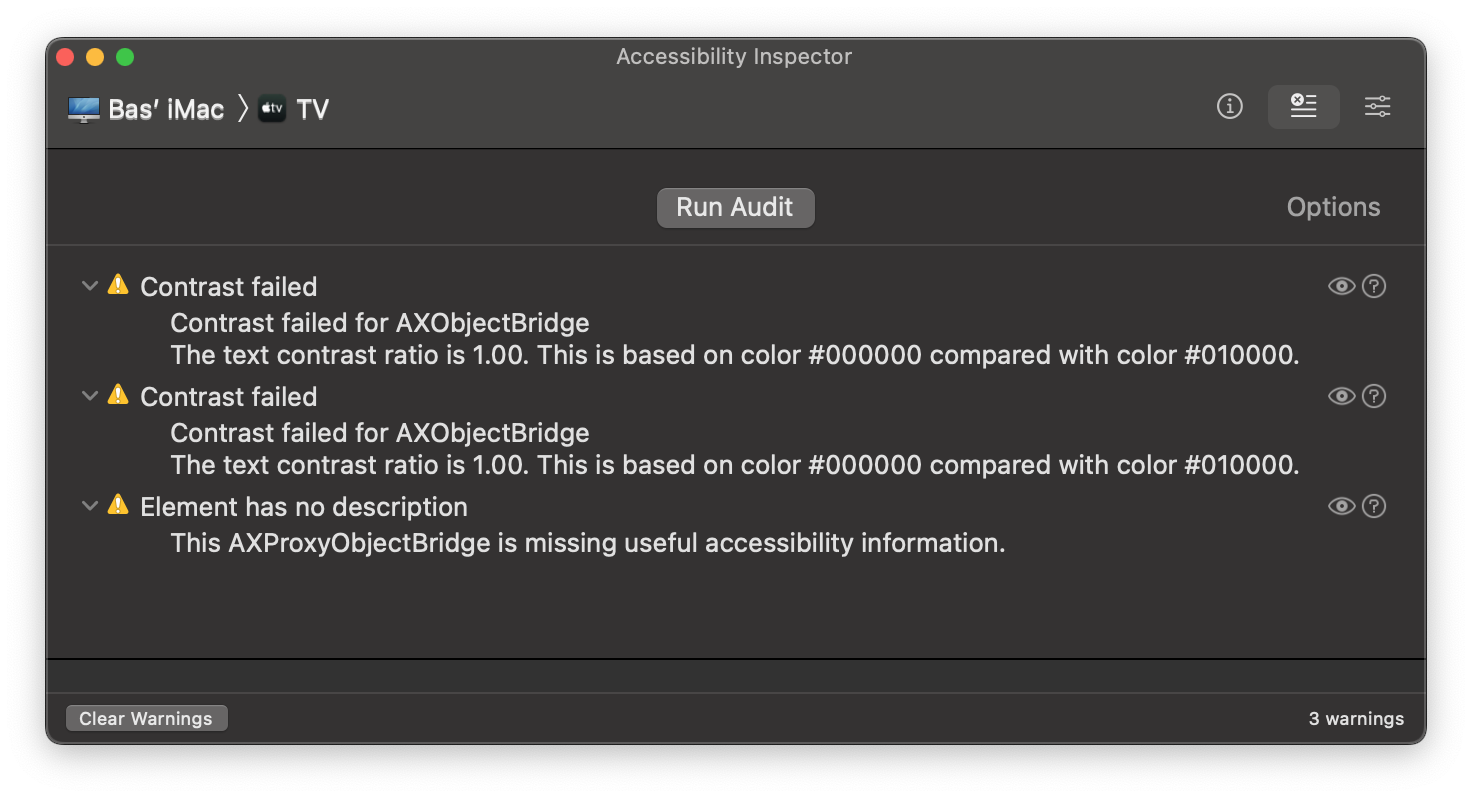
Audit
With the Accessibility Audit, you can run an audit on a specific view. By default, it scans element descriptions, hit regions, contrast, element detection, parent/child relationships and actions on Mac, and on iOS, element descriptions, contrast, hit regions, element detection, clipped text, traits and large text.
Running an audit can be a fantastic way to get an overview of what can be done to make a specific view more accessible. While it isn’t guaranteed to point out everything, it will most certainly give you some good indications of what can be improved, from color contrast issues labels duplicating information included through traits.
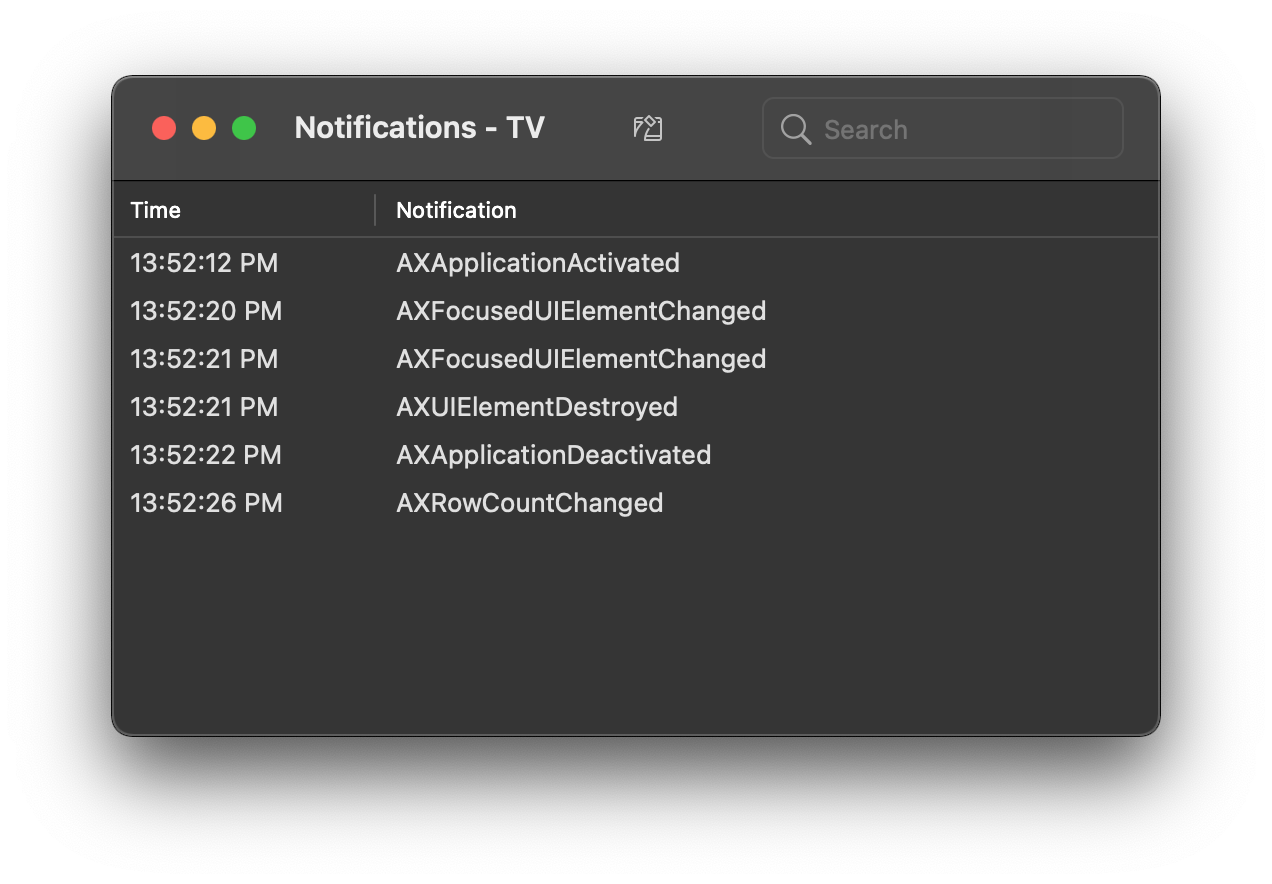
Notification Console
In the Accessibility Inspector’s menu bar, go to Window > Show Notifications
to open the notification console. This console polls for accessibility
notifications an app sends out, and can help you debug accessibility issues
that are relying on notifications, like moving an assistive technology’s pointer
focus or announcements.
Color Contrast Calculator
In the menu bar, there’s another tool: Window > Show Color Contrast Calculator
opens a window with a tool to calculate color contrast for text on a background.
Useful to check if those custom (brand) colors you’re using pass the expected
color contrast.

Conclusion
The Accessibility Inspector gives you a great tool to better understand accessibility in your app, allowing you to verify information without needing a physical (iOS) device. Aside from the manual verification it allows, it comes with a built-in audit that gives you a rundown of a certain view’s accessibility.
From here, with your app starting to become more accessible, and insights on how to verify it, you may want to (further) look into testing certain parts of accessibility with unit and/or UI tests.
Let me know your thoughts on this post, and if you have any questions, I’d love to help!
- Getting Started With Accessibility: VoiceOver
- Improving Accessibility: VoiceOver
- Verifying VoiceOver: Accessibility Inspector (this post)
- Improving Accessibility: Voice Control
- Getting Started With Accessibility: Dynamic Type